Install bitnami/nginx
Installing the Bitnami standalone NGINX web server Chart involves us using the helm install command.
When we install using Helm, we need to provide a deployment name, or a random one will be assigned to the deployment automatically.
Challenge:
How can you use Helm to deploy the bitnami/nginx chart?
HINT: Use the helm utility to install the bitnami/nginx chart and specify the name mywebserver for the Kubernetes deployment. Consult the helm install documentation or run the helm install --help command to figure out the syntax
helm install --name mywebserver bitnami/nginx
Once you run this command, the output confirms the types of k8s objects that were created as a result:
NAME:   mywebserver
LAST DEPLOYED: Tue Nov 13 19:55:25 2018
NAMESPACE: default
STATUS: DEPLOYED

RESOURCES:
==> v1beta1/Deployment
NAME               AGE
mywebserver-nginx  0s

==> v1/Pod(related)

NAME                                READY  STATUS             RESTARTS  AGE
mywebserver-nginx-85985c8466-tczst  0/1    ContainerCreating  0         0s

==> v1/Service

NAME               AGE
mywebserver-nginx  0s
In the following kubectl command examples, it may take a minute or two for each of these objects’ DESIRED and CURRENT values to match; if they don’t match on the first try, wait a few seconds, and run the command again to check the status.
The first object shown in this output is a Deployment. A Deployment object manages rollouts (and rollbacks) of different versions of an application.
You can inspect this Deployment object in more detail by running the following command:
kubectl describe deployment mywebserver-nginx
The next object shown created by the Chart is a Pod. A Pod is a group of one or more containers.
To verify the Pod object was successfully deployed, we can run the following command:
kubectl get pods -l app=mywebserver-nginx
And you should see output similar to:
NAME                                 READY     STATUS    RESTARTS   AGE
mywebserver-nginx-85985c8466-tczst   1/1       Running   0          10s
The third object that this Chart creates for us is a Service The Service enables us to contact this NGINX web server from the Internet, via an Elastic Load Balancer (ELB).
To get the complete URL of this Service, run:
kubectl get service mywebserver-nginx -o wide
That should output something similar to:
NAME                TYPE           CLUSTER-IP      EXTERNAL-IP
mywebserver-nginx   LoadBalancer   10.100.223.99   abc123.amazonaws.com
Copy the value for EXTERNAL-IP, open a new tab in your web browser, and paste it in.
It may take a couple minutes for the ELB and its associated DNS name to become available; if you get an error, wait one minute, and hit reload.
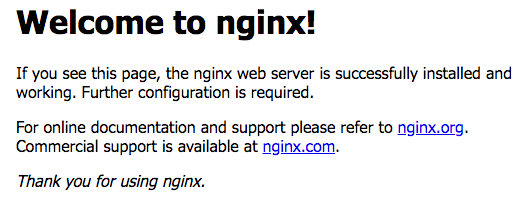
When the Service does come online, you should see a welcome message similar to:

Congrats! You’ve now successfully deployed the NGINX standalone web server to your EKS cluster!